SoCal Beekeeping
Beginning Beekeeping
The Langstroth Hive
P. Michael Henderson
October 17, 2020
The most common hive is the 10 frame Langstroth Hive, named after Lorenzo L. Langstroth (1810-1895), who patented the concept of the Langstroth hive in 1852. The modern Langstroth hive differs slightly from the patent, primarily in certain dimensions, but it's the same concept.
The Langstroth hive, as we use it, consists of several boxes stacked atop each other. Inside the boxes are frames, which are hung vertically, where the bees build their comb. This allows the beekeeper to remove the frames (and comb) to examine the status of the hive, or to remove frames filled with capped honey, without damaging the bee colony.
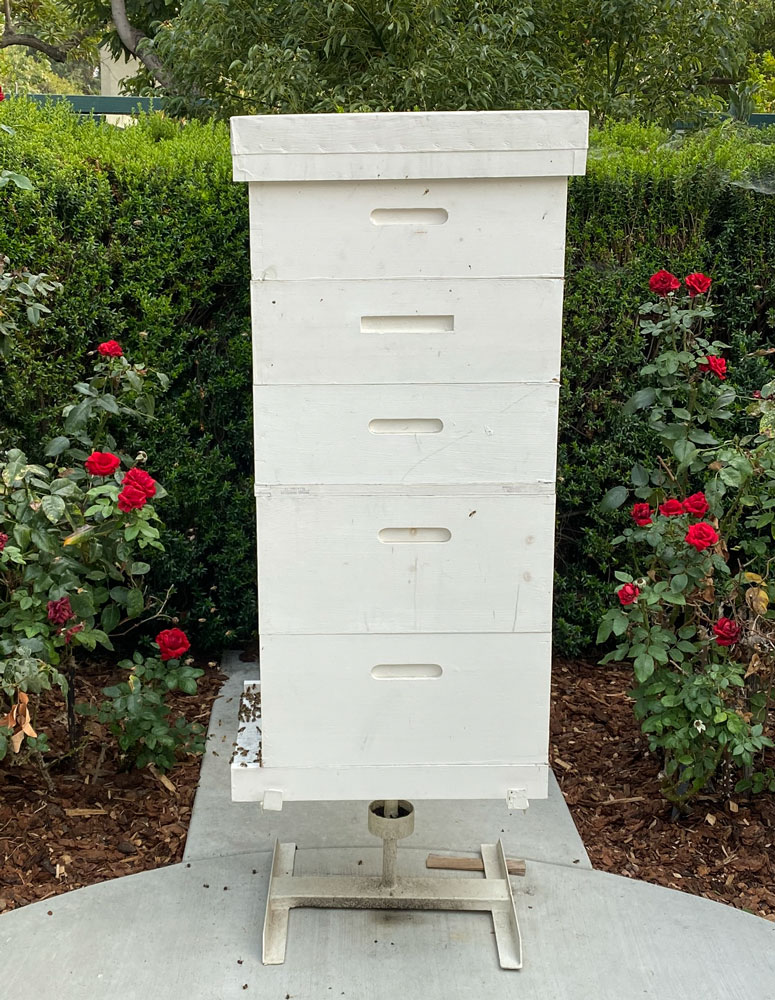
Here's a picture of a large, mature hive. I'll talk about the components of the hive next.

The Hive Stand
Here in the Villa Park area you need a hive stand. Not because the hive has to be raised some amount but because of ants. Our gardens are infested with Argentine ants and they will attack a weak colony and can destroy it. When you're getting your bees started they are considered "weak" - there are not a lot of bees in the hive and they can't fend off the ants. Once a hive gets strong they can fend off ants but, even then, they can produce more honey if some of the bees don't have to spend their time fighting ants.
A traditional hive stand is a simple platform with four legs. You get a four cans that a leg will fit into and put a can under each leg. Then put some oil in each can. The ants cannot cross the oil so your bees are safe. Some people use grease instead of oil. That works but it collects dust and eventually the ants can walk across the grease on the dust.
Here's a commercial hive stand (Mann Lake). It's about $50. You can build one yourself from 2x4's fairly easily.
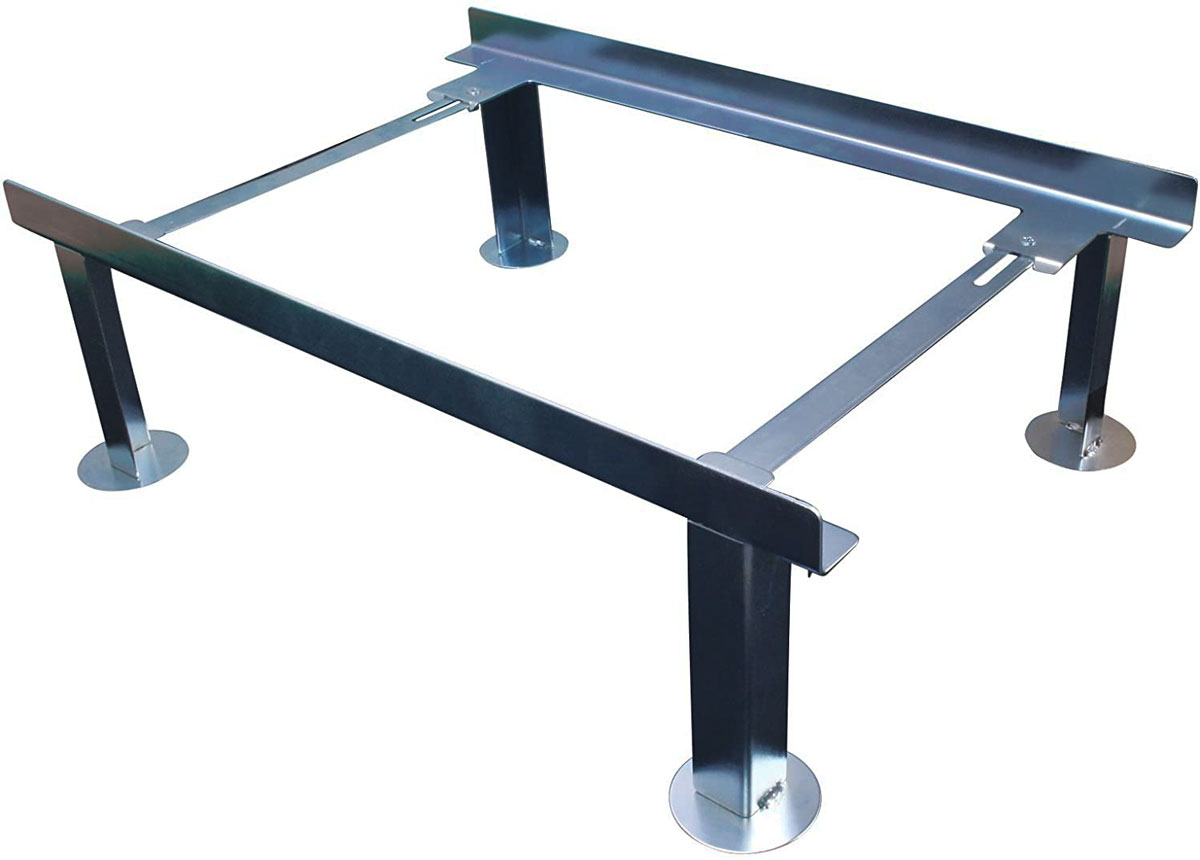
The problem with a stand with four legs is that the oil cans are exposed. When it rains they fill with water and drive out the oil. If they're in the path of a sprinkler it's the same thing. Leaves and garden debris also falls into the cans and can make a bridge across the oil for the ants - and they will find the path. This is separate but make sure there are no weeds that have grown up and are touching the hive. The ants will find that, also.
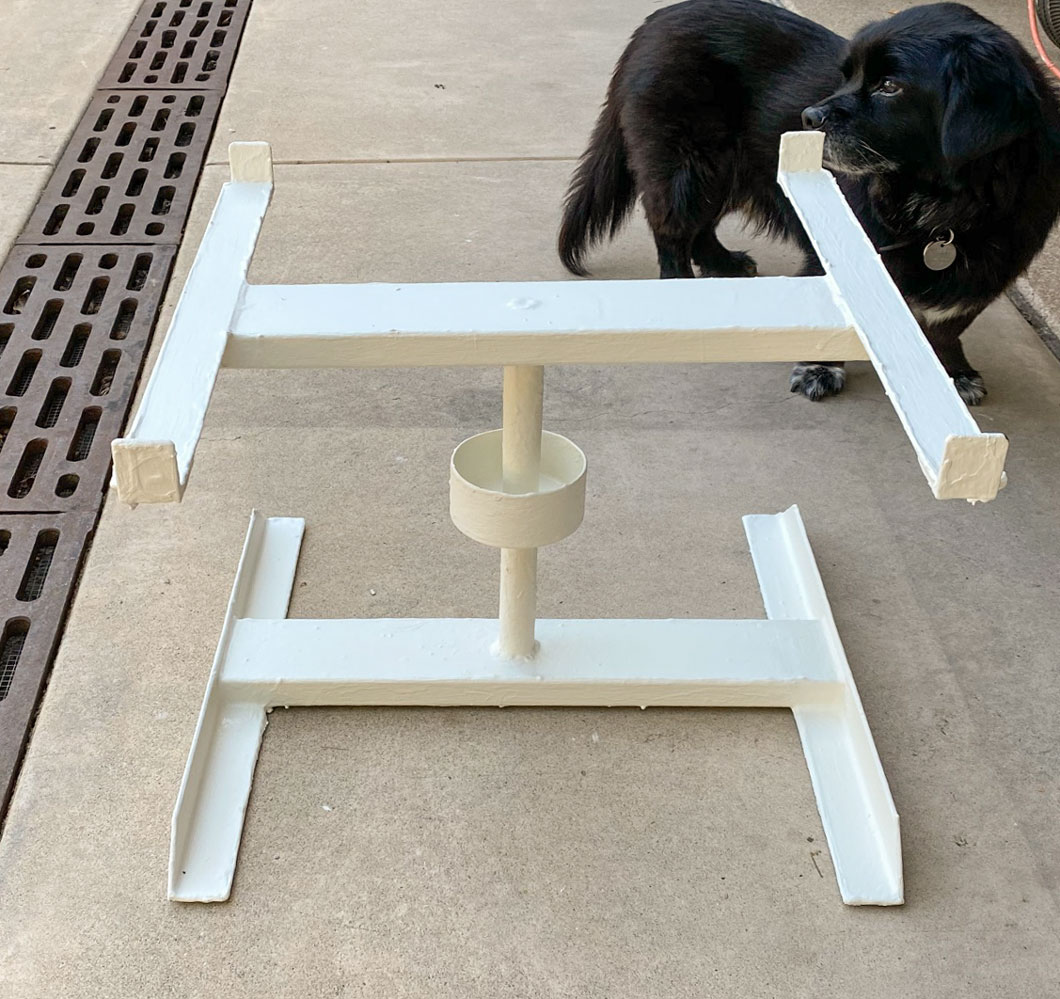
A beekeeper friend used another type of hive stand and I copied it. The problem is that it's not commercially available so you have to get a metal worker to make it for you. I have a friend who does metalwork and he made several for me. But he said he's not interested in making them for sale - so if you want one you'll have to find your own metalworker.
The advantage of this hive stand is that the oil container is directly under the hive so it's shaded from rain and most trash. It's worked well for me to keep ants out of the hives. I repainted this stand for these pictures. That's Skipper in the picture.
Bottom Board
An aside here: I'm a woodworker and make all my wooden hive components except the frames. You can purchase a complete hive from one of the beekeeping supply houses, either just the boxes or with the frames included. It's difficult for me to quote a price because they have many different choices. For just the boxes, the lowest price will be if they ship you the parts and you put it together. That's because shipping an empty box is more expensive than shipping the boards.
The bottom of the hive proper is the bottom board. Its purpose is to close the bottom of the hive and to provide a place for the bees to enter and depart the hive. For the 10 frame hive it's about 22 inches long and 16 1/4 inches wide. The sides stick up from the floor of the bottom board by about 3/4 inch.
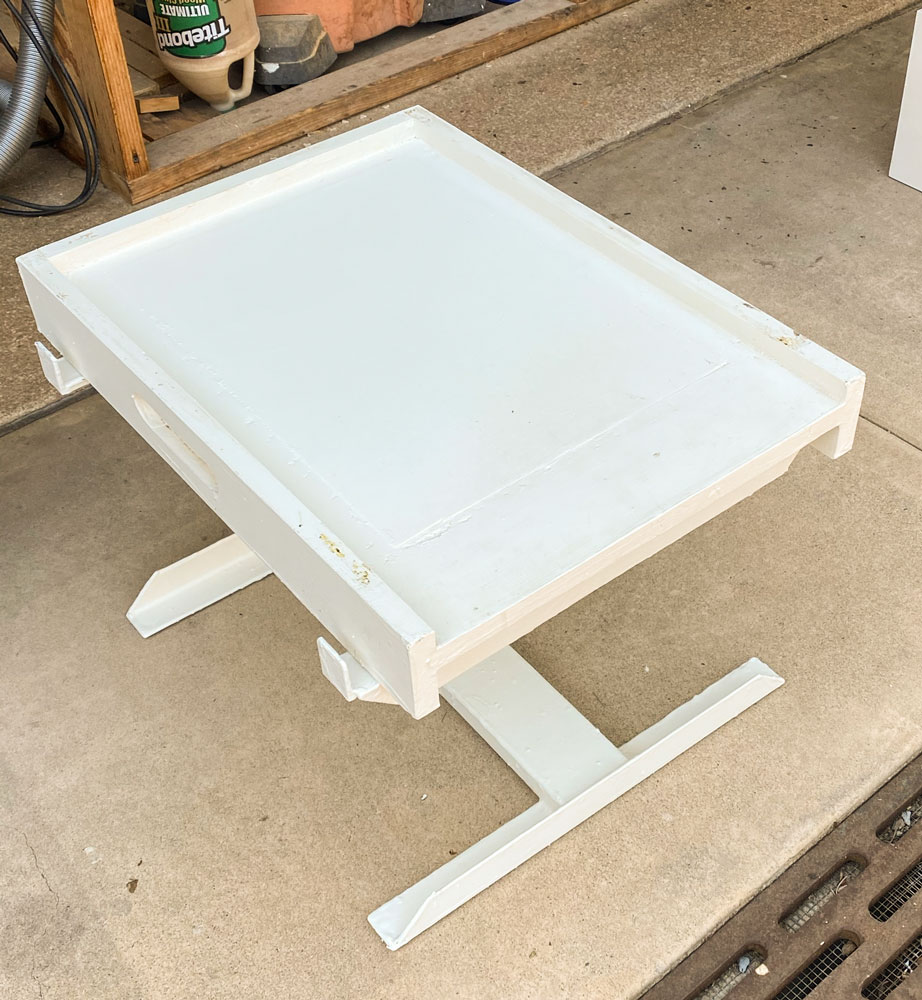
The bottom board in the picture is a solid bottom board. Another type you'll hear about is the screened bottom board. I used to use screened bottom boards but am now converting to the solid bottom board. This bottom board is one that I converted. You can see in the center of this bottom board I've replaced where the screen was with a piece of plywood.
Screened bottom boards got started because researchers used them along with sticky boards under the screen to monitor the number of varroa mites that fell through the screen (1/8 inch screen). A lot of people jumped on the idea and screened bottom boards became the "thing" a few years ago. I found some problems with them, however. First, you have to keep a board under the screen. The bees want a dark chamber and don't like the light that comes in through the screen if you don't block it off. They'll tend to not use the bottom brood box and will work hard to close the screen with propolis.
Second, when bees emerge from their cells, they chew through the cap that was on their cell. The residue falls to the bottom of the hive and with a solid bottom board, the housekeeping bees will throw it out. With a screened bottom board, it falls through the screen and the bees can't get to it. Any other trash in the hive tends to also fall through the screen. If the beekeeper doesn't empty it on a regular basis it can build up and become a breeding ground for wax moths.
The bees evolved with a solid bottom to their hive and have behaviors to deal with it.
Brood Box
There are three generally accepted sizes of boxes used with the Langstroth hive. Assuming that the boxes are made from 3/4 inch stock, the outside dimensions are 19 7/8 inches long by 16 1/4 inches wide. What varies is the height of each box.
The largest box is generally called a "Deep" and is 9 5/8 inches high. The next size is the "Medium" and is 6 5/8 inches high. The smallest is the "Shallow" and is 5 11/16 high. Why are there three sizes?
The primary reason is weight. As a beekeeper you'll have to lift these boxes - most often for honey harvest but also occasionally when you're checking on the status of the bees or searching for the queen.
A full deep box can weight 90 pounds. A medium (full of honey) can easily weigh 50 pounds. And a shallow can weigh about 40 pounds. Those weights can be more than a beekeeper can handle so some people use 8 frame equipment, instead of 10 frame equipment, because the 8 frame will be lighter. With 8 frame equipment the deep would be maybe 70 pounds, a medium about 40 pounds and a shallow about 30 pounds.
For the honey harvest you can remove frames instead of removing a full super so you can avoid the weight issue to some extent. When the frames aren't full you might remove a super to get to the one below it, but it will not weigh the maximum because it's not full.
The first choice you need to make is what size of boxes you wish to use. Some people use mediums for everything. The advantage is that you only need one size frames. The disadvantage of mediums for brood is that the boxes are smaller but you could use three mediums instead of two deeps.
I use deeps for brood and mediums for honey. Here's a deep sitting on the bottom board, with 10 frames in it.
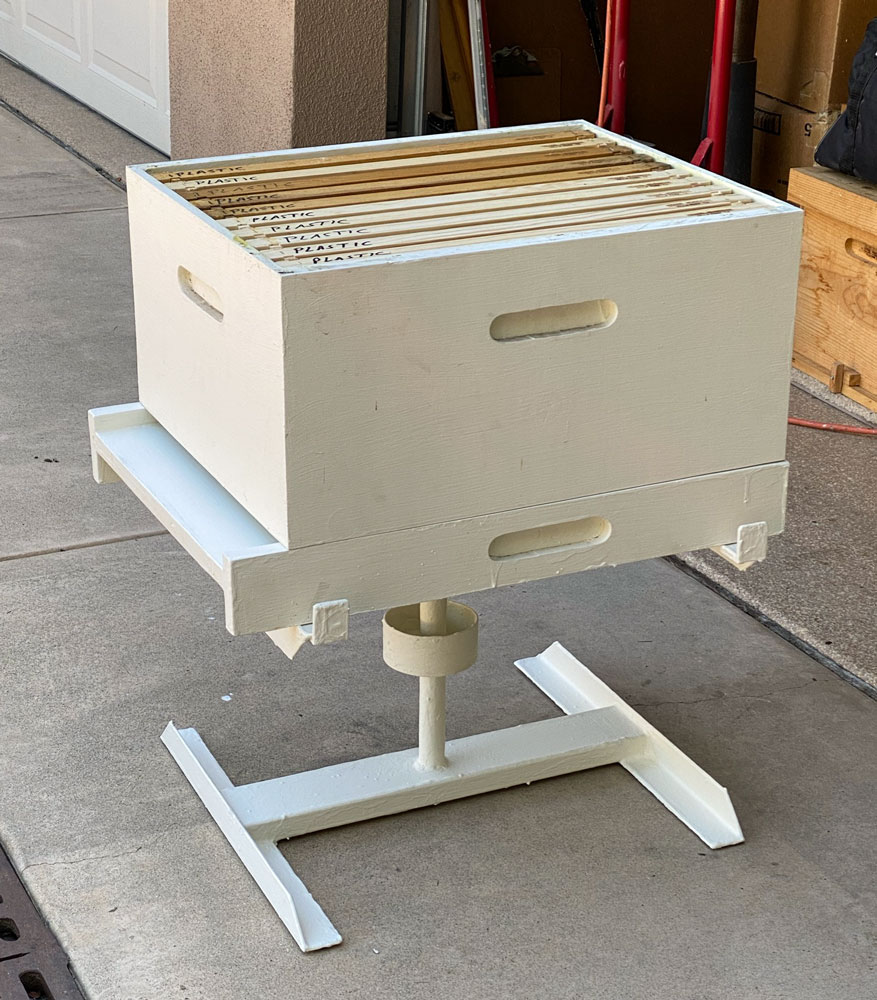
I mentioned earlier that I make my boxes. You'll notice that the boxes are painted. To a large degree it doesn't matter what color you paint the boxes. Some research indicates that if the hives are different colors the bees will "home" better (not go to the wrong hive). Home Depot used to put cans of returned paint on a rack in the store and sell it at greatly reduced prices. I used to buy my paint there - as long as it was exterior paint - and that's what I would paint the hives. I tend to use light colors because I believe they're cooler for the bees.
Even if you don't make your own boxes you may purchase unpainted boxes and decide to paint them (they'll last longer if painted).
Inside the box are the frames and inside each frame is something called "foundation". Foundation can either be a sheet of wax impressed with a pattern of hexagons or plastic with hexagons coated with wax. I started with wax foundation but have moved to plastic foundation.
Here's a frame with plastic foundation.
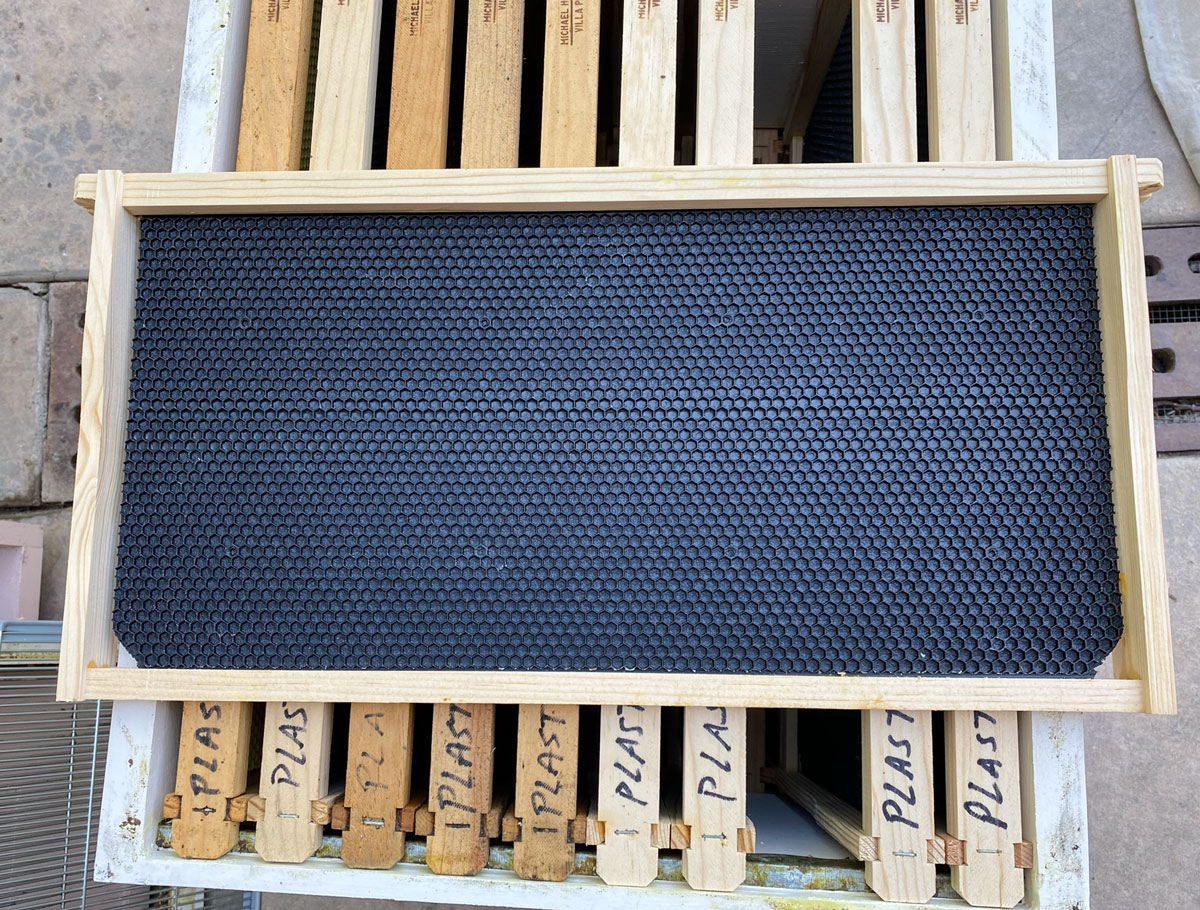
You'll notice that this foundation is black. It also comes in yellow.
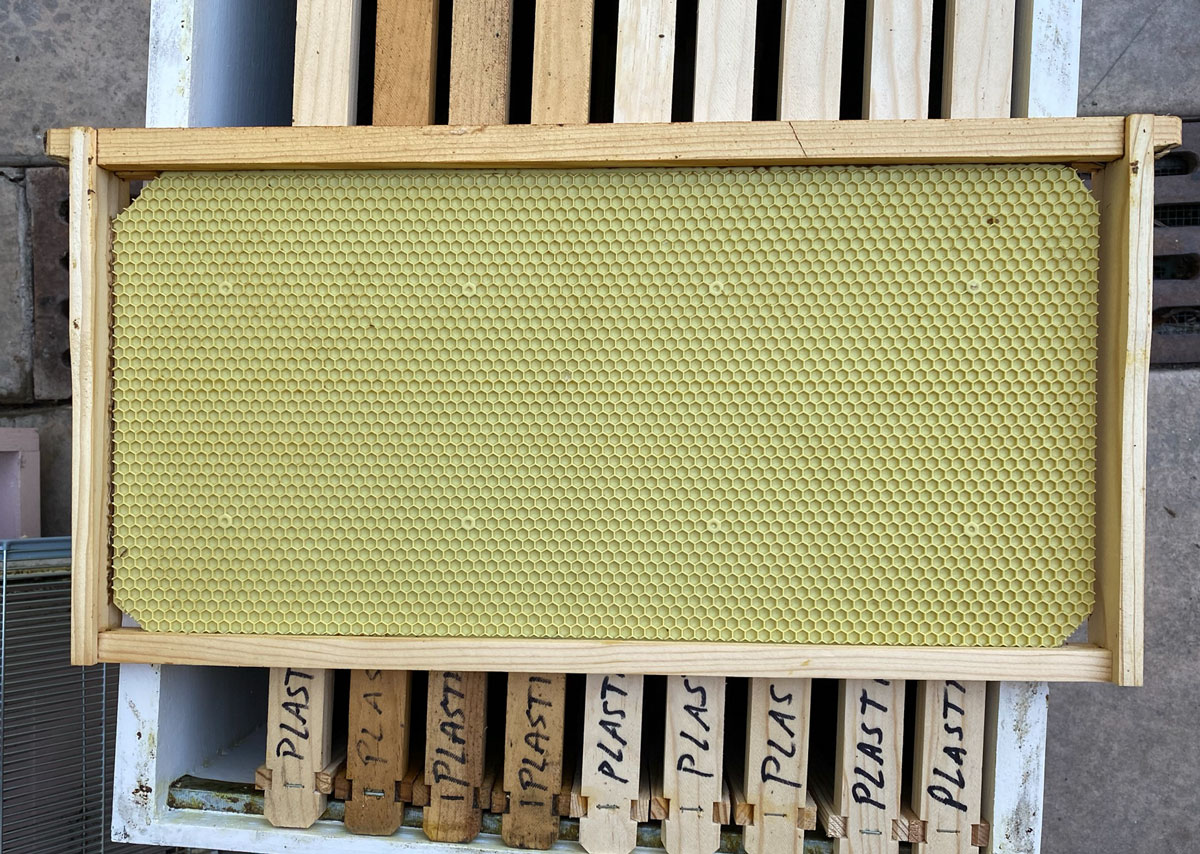
So why black and yellow? I mentioned that deeps are often used for brood boxes where the bees raise their young. When the queen lays an egg, she sticks it to the bottom of the cell pointing upward. This makes it difficult to see the eggs because you're looking at them end-on. The egg is white and is easier to see against the black foundation than against the yellow. [Note: after about a day, the egg lays over and is easier to see. After three days, the egg "hatches".]
But some people use deeps for honey and prefer the yellow foundation. To the bees it doesn't make any difference. The nest is dark so they don't know what color the foundation is.
So why did I go to plastic foundation from wax? Wax foundation is not rigid and can "bow", or bend in the frame, making it closer to one of the next frames than the other. That can make it a bit harder to remove from the hive. The plastic foundation is straight and generally stays that way. The brood comb made on it is straight and regular and easy to work with.
I've been told that the bees don't take to plastic foundation as readily as wax foundation but I've not experienced that. When that's all they have, they use it. And once they draw out the comb the foundation is buried in the middle of the comb and all the bees experience are the cells.
One difference is that the bees will generally chew a hole in the wax foundation to allow easy access from frame to frame. I cut the corners of the plastic foundation to give them that same access.
If you decide to use plastic foundation the easiest thing to do is to purchase the frames assembled with the foundation installed. I highly recommend wooden frames with plastic foundation. They also make plastic frames with plastic foundation. The thing I don't like about the plastic frames is that they have grooves in them that make an ideal place for small hive beetles to hide.
Last time I ordered frames with plastic foundation they were about $35 for ten of the deep frames. Super frames were a bit less. I think this was on sale.
If you go with wax foundation you'll have to assemble your frames and install the foundation. Ten deep frames are about $16 and ten deep wax foundation sheets are about $19, for a total of $35. So frames with wax foundation are about the same price as frames with plastic foundation - and you have to assemble the frames for the wax foundation. I have the tools to do the assembly (especially an air powered staple gun) so it's not difficult for me. But if you don't have any tools it might be a problem.
Some beekeepers don't use foundation and let the bees draw out the comb by themselves. That can work but sometimes the bees draw the comb in ways that cause problems for the beekeeper, such as drawing comb from side-to-side across the box. There are ways to minimize this but I'm not going to discuss foundationless beekeeping - it would divert us too long here.
Those frames have to be supported somehow and that's what I'll discuss now. Here's a look into an empty deep box. Note the "ledge" on each side.
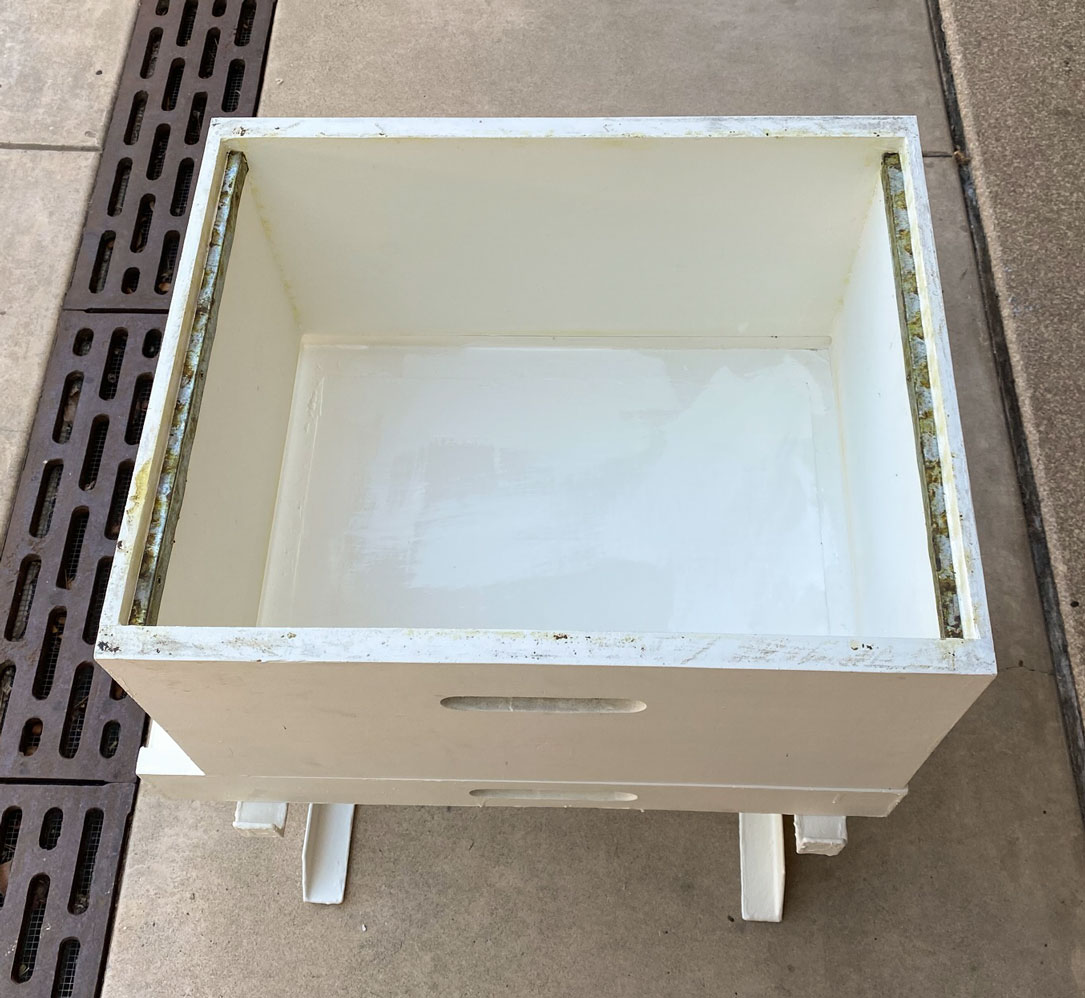
Here's a close up of that ledge.
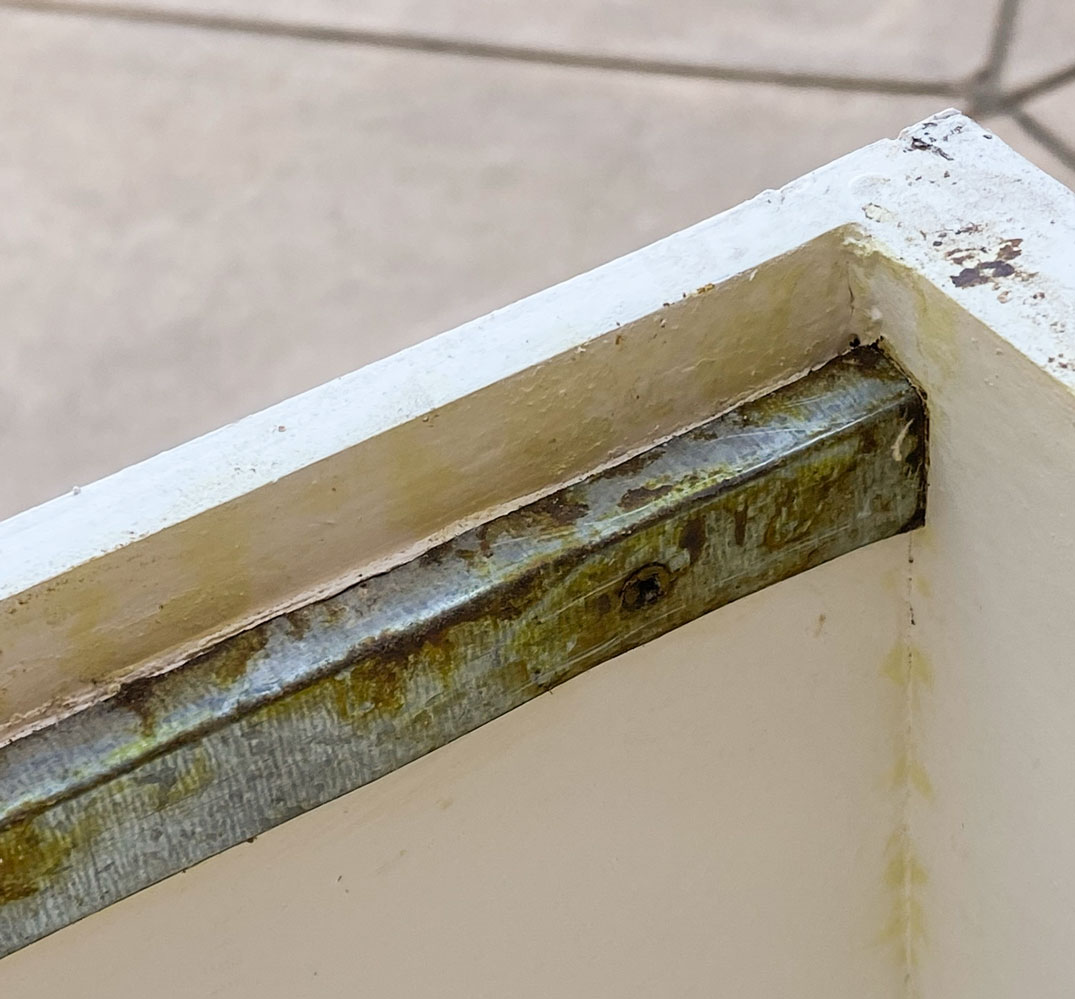
In woodworking terms, it's rabbet that is 3/8 inch (half the width of the 3/4 inch side) by 5/8 inch. Everyone told me to put a strip of metal on the ledge to keep from damaging the ledge when lifting frames, but since I use a J-tool to remove frames I never touch the ledge. Therefore the metal strip is probably not necessary for me.
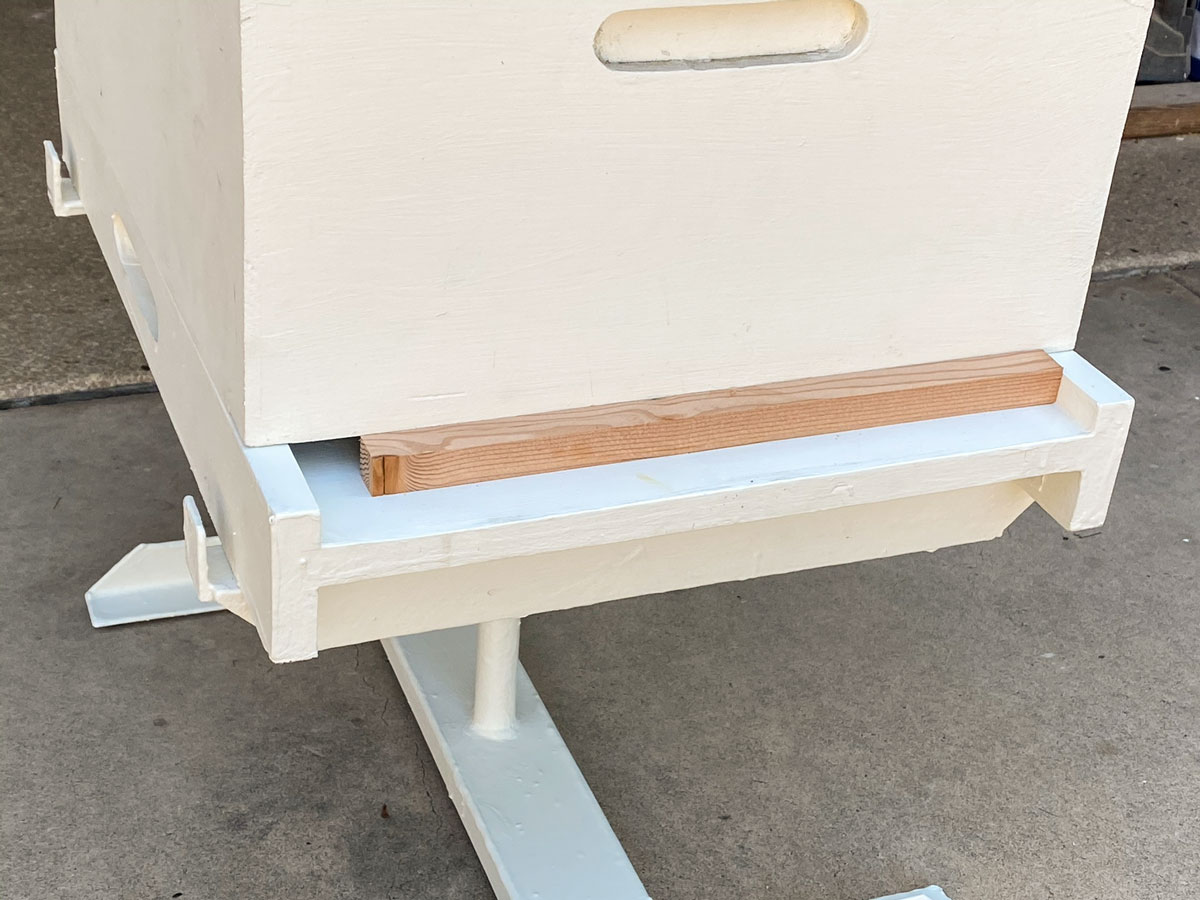
One more thing before I leave the brood box. Note the opening for the bees at the bottom front of the box. That opening is about 15 inches wide and 3/4 inch high. When the weather is hot, the bees sit at the opening and fan their wings to circulate air in the hive. But at other times, that opening can be too big and cause problems. When a hive is small (not a lot of bees), that opening can be too large for the bees to defend and can expose the hive to robbing. When I hive a swarm I put a piece of wood at the opening to block off most of the opening so it's only about an inch wide. If you've seen wild hives that take up residence in a homeowner's wall you'll see that the opening is usually quite small - sometimes just a crack - and the bees do quite well getting in and out. But the wood of the Langstroth box is thin (3/4 inch thick), and out in the sun, so you want to give them a full opening for cooling once they're a strong hive.
As the hive grows you can gradually make the opening larger in steps until you open it all the way.
As a hive grows, I'll use two deep boxes for the brood area.
And just a comment about how the bees use the brood area. Think of a basketball in the brood area, sliced by the frames. That "basketball" is where the queen lays the eggs for the brood. Around the outside of that brood area is where the workers usually store pollen. So there's a band of pollen, sort of like the skin of the basketball, around the brood area. And outside of the pollen is where they store honey.
So when you go into one of the brood boxes and remove the outside frame (frame 1 or frame 10) you'll find that it's mostly honey, with maybe some pollen. The brood will be more towards the center of the box. Bees being what they are, the brood area could be offset to one side or the other but it will always be a basketball shaped area. The bees do that because they cluster to keep the brood warm (about 95 degrees).
Excluder
While we want to give the bees lots of room to raise new bees, we do not want brood in the area of the hive where we'll harvest honey. We will put boxes (called 'supers) above the brood area and we'll harvest honey from those boxes. So how do we make sure the queen doesn't lay any eggs in those boxes? The answer is an excluder. This is a device that covers the top brood box and has openings in it that are only large enough for the worker bees to get through. The queen (and drones) are larger and cannot get past this device. It's called an "excluder" because it excludes the queen.
Here's a metal excluder. They also come in plastic.

This one is thin, just as thick as the metal rods.
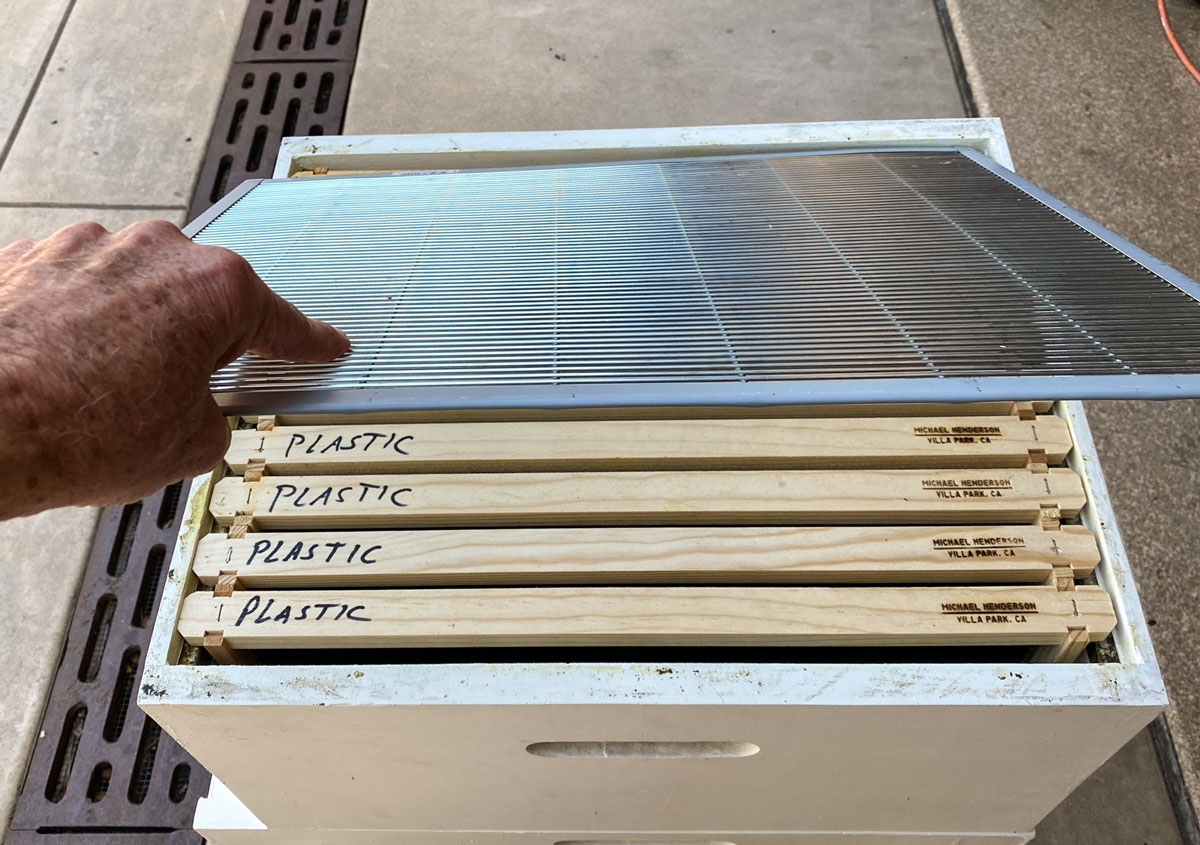
I prefer a wood encased excluder. This one has been used. The bees attached burr comb to the excluder. After I scraped the comb off, I used a torch to melt the remaining wax that was on it.
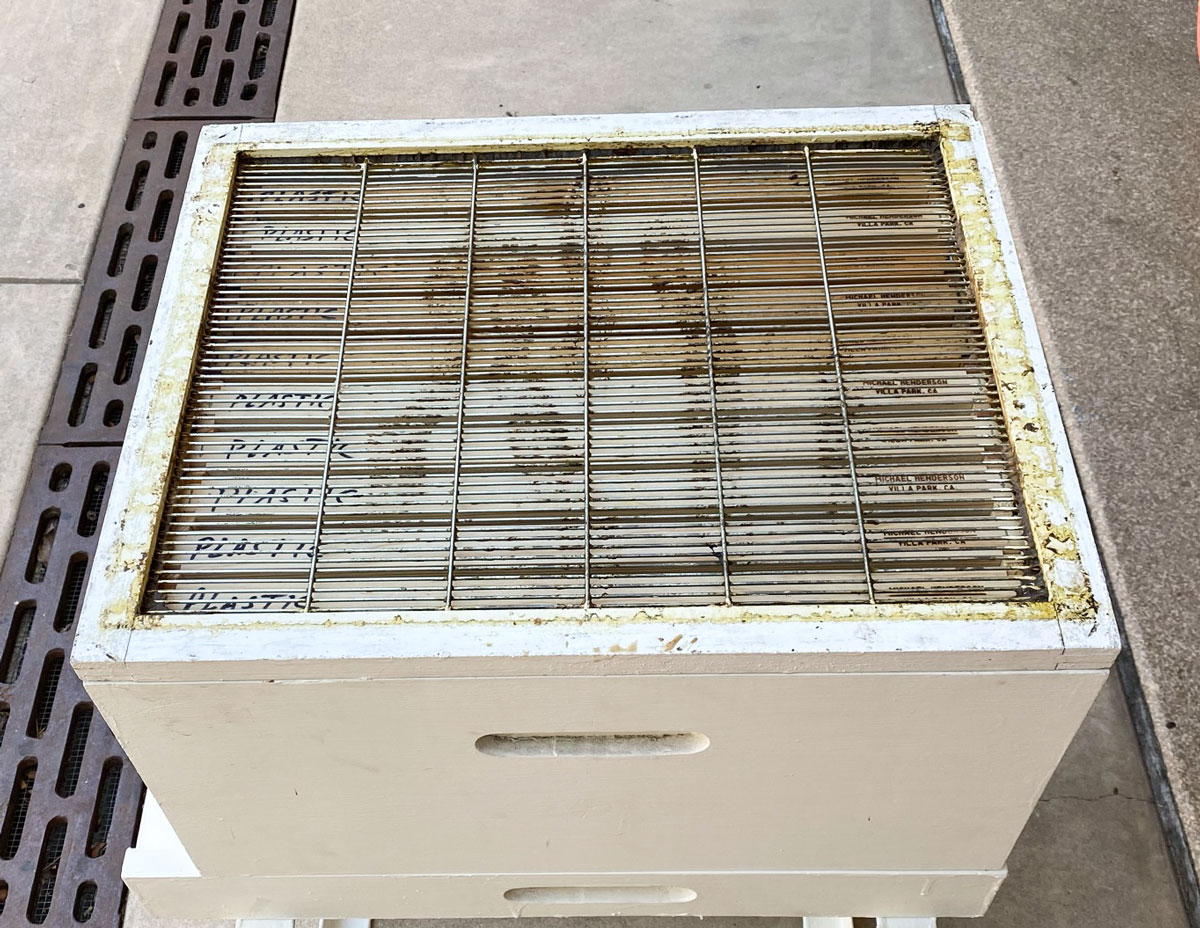
Here's an edge view to show the thickness.
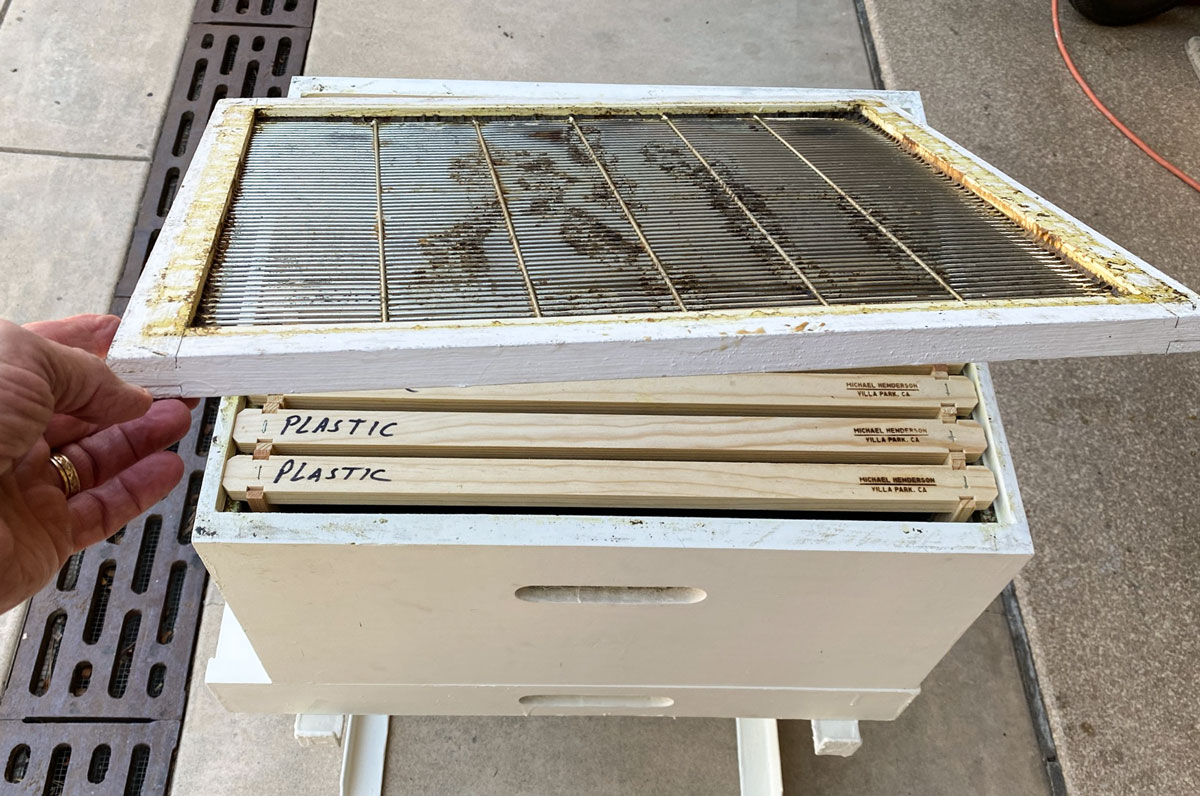
I prefer the wood encased because it seems to me that the bees don't build as much burr comb on these as on the flat excluders. The plastic excluders are the lowest cost ($4.20), the metal not encased are the next most expensive ($7.20) and the wood encased are the most expensive ($18.25).
Super
On top of the excluder we place one or more supers. I use the medium box. To reiterate, the reason most people do not use deep boxes for supers is that a deep box full of honey is very heavy - could be 80 - 90 pounds. And the position of the super on the top of the hive makes it awkward to lift up. A medium box full of honey is heavy and awkward enough:-)
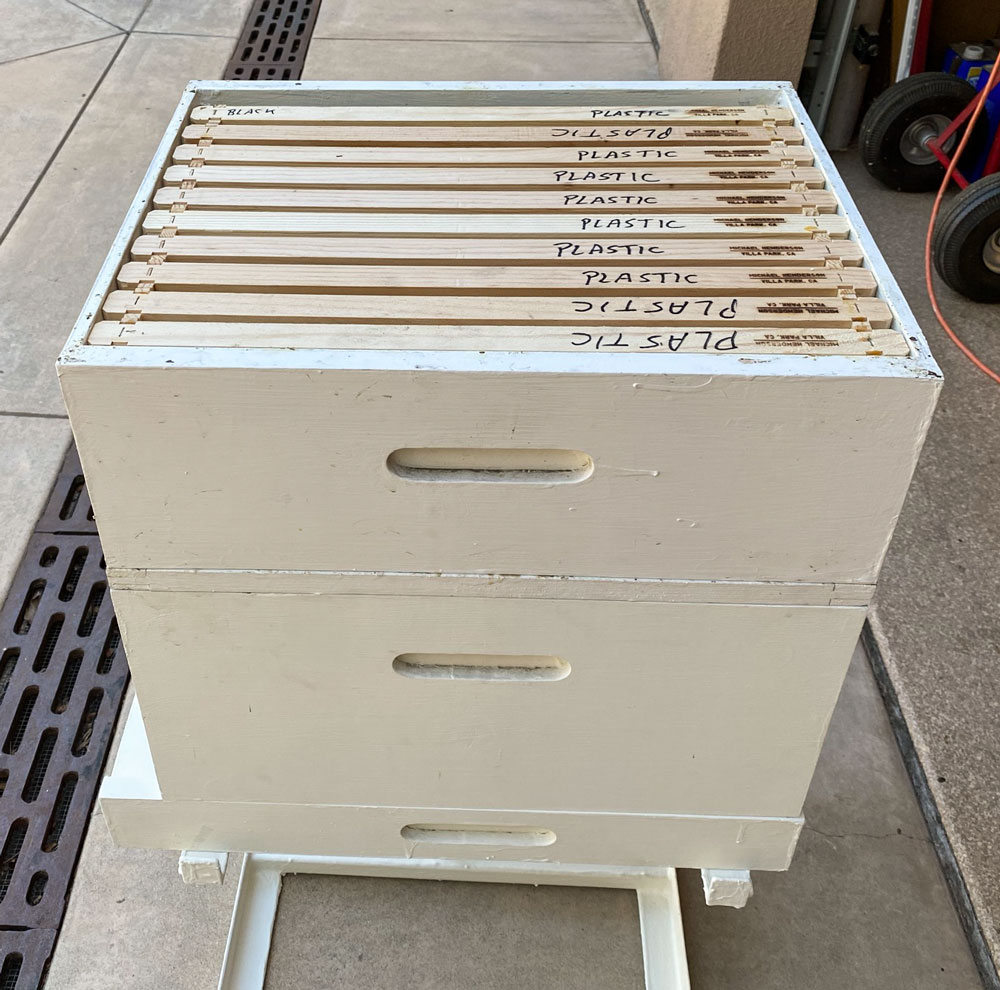
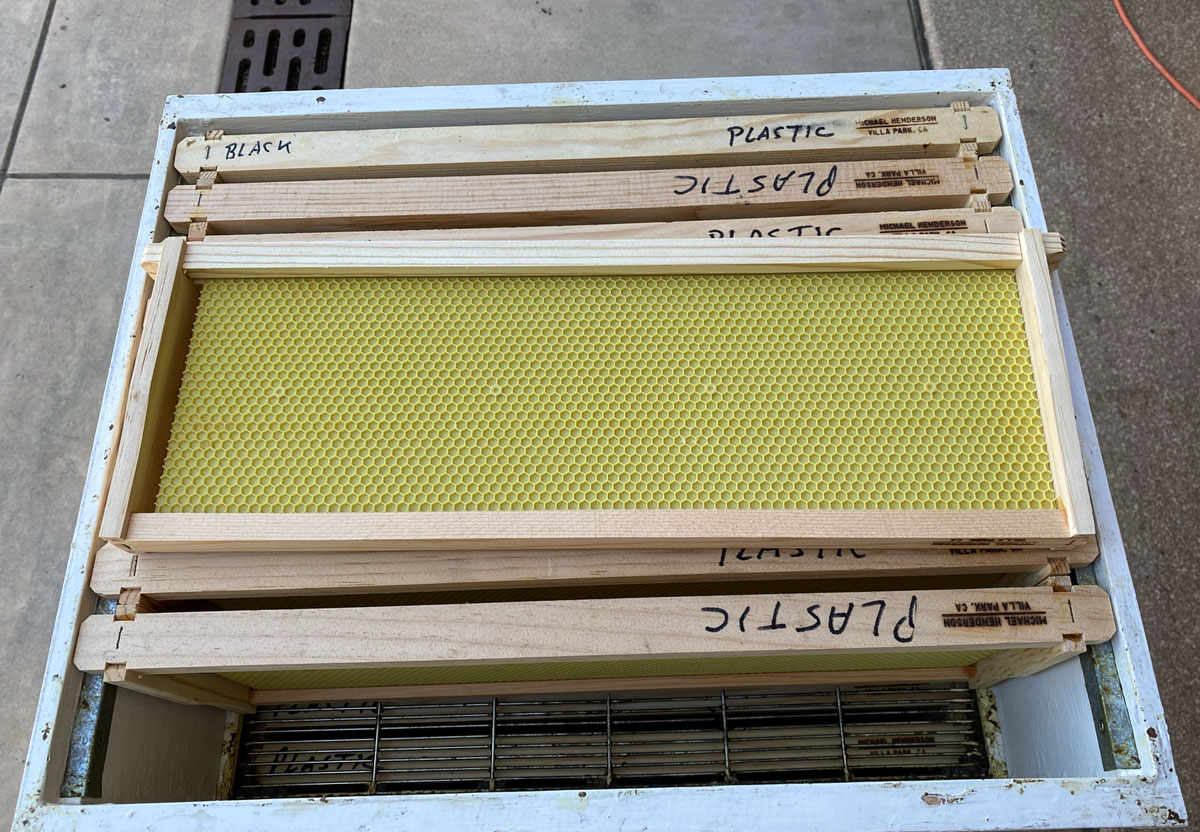
The super holds 10 frames, although I'm starting to space out 9 in a super now to see how that works. [Update 7/4/2024: Nine frames didn't work well. I'll stick with ten.]
The frames are the same as the brood frames but not as deep. I use plastic foundation in the supers, also.
Cover
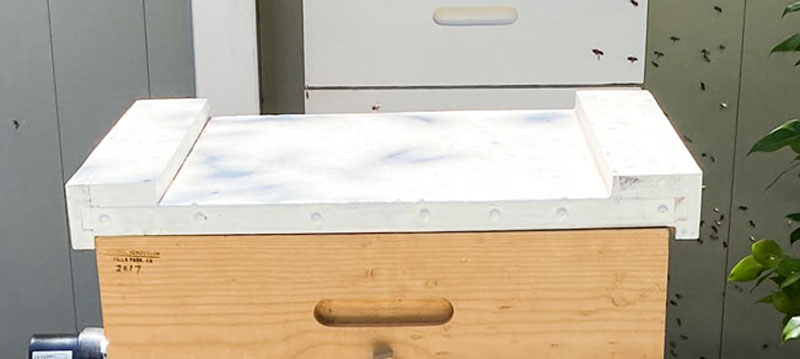
There are two general types of covers used on hives - the migratory cover and the telescoping cover. I began using the migratory cover but converted to the telescoping cover.
I don't have any migratory covers any more but here's one from a picture I took a while back. The ends protrude down to keep the top aligned with the hive. The bees glue the cover down - they're just patching up the crack between the top and the cover - so you have to pry the migratory cover off the hive.
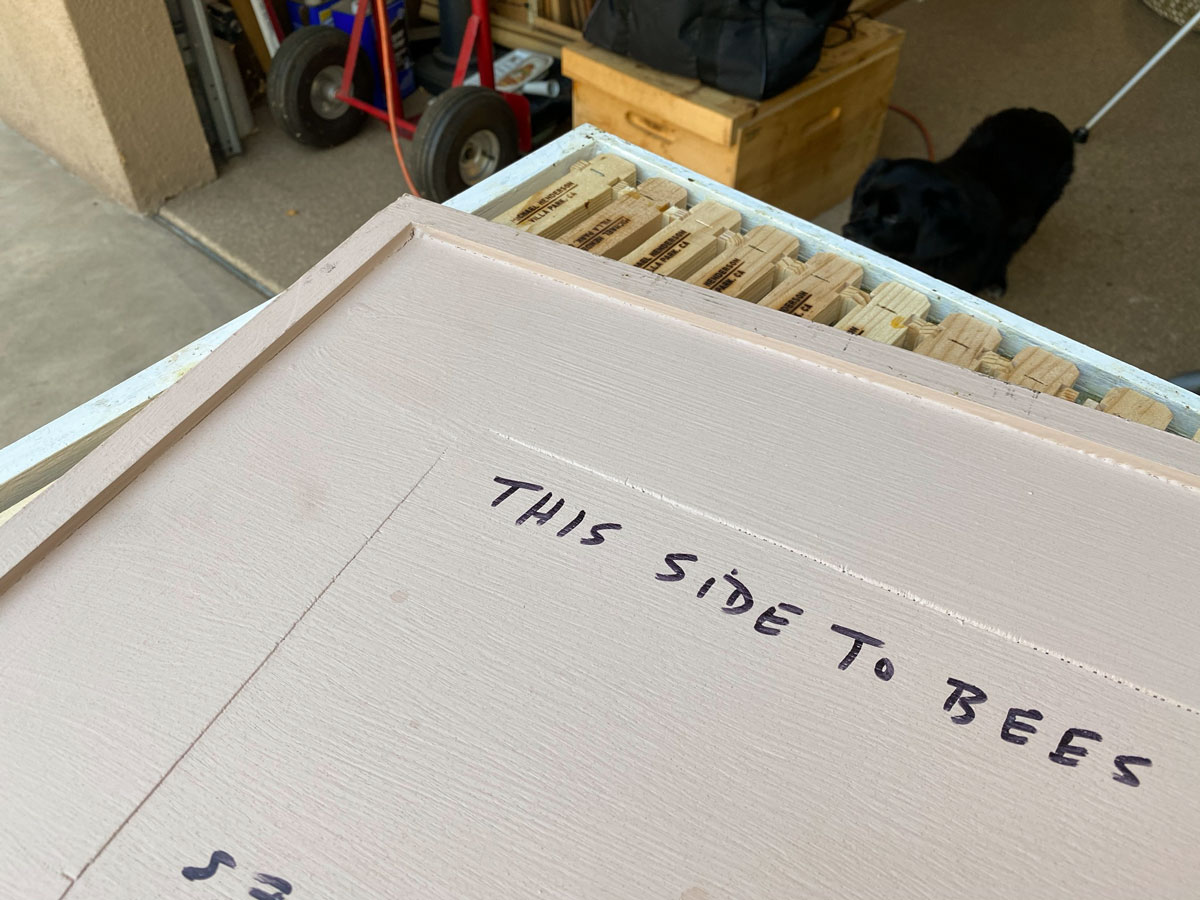
With the telescoping cover there's an inner cover. If there were no inner cover you'd never be able to get the cover off - the bees would have it glued down and there's no place to pry. This will be clearer with some pictures. Here's an inner cover.
The bees will glue this cover down but you can use a hive tool to pry it off.
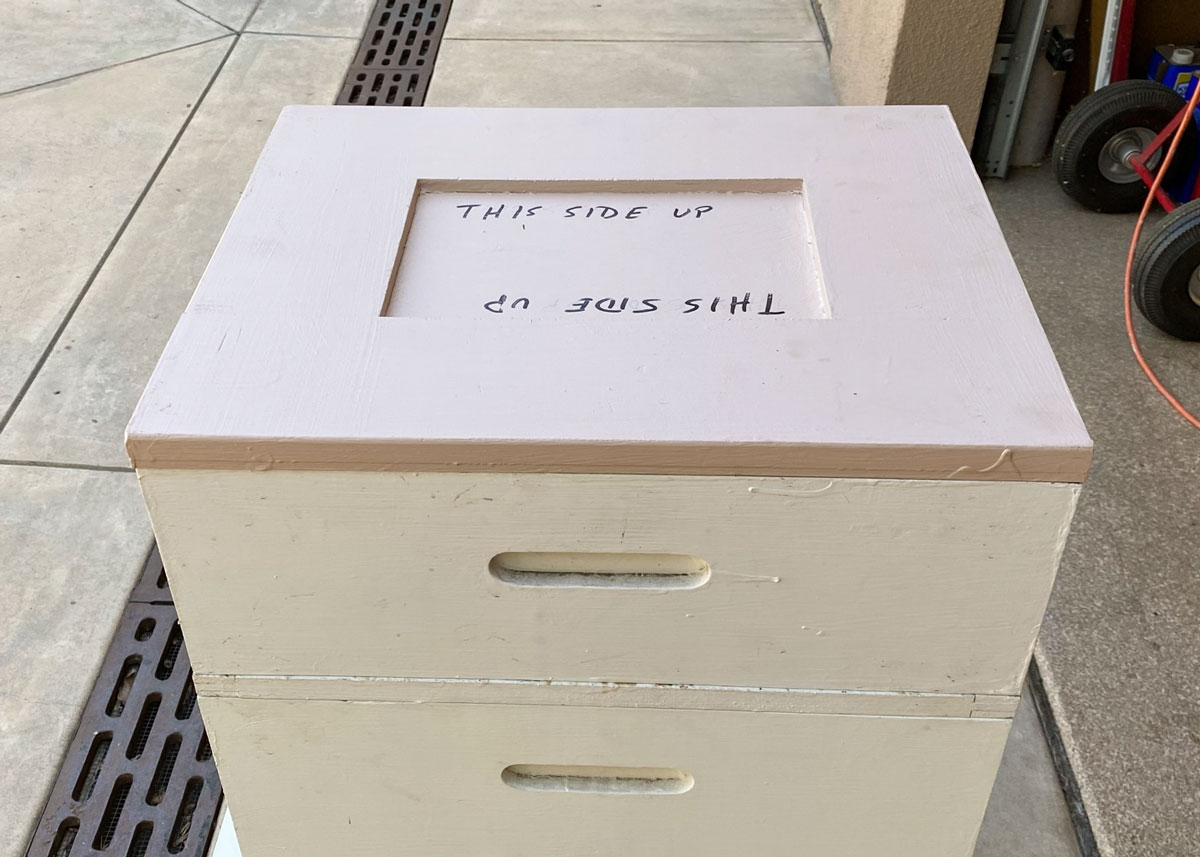
I put a 1/4 inch border on the hive cover. I find the bees don't attach as much burr comb to the cover with that space.
The telescoping cover goes over the inner cover.
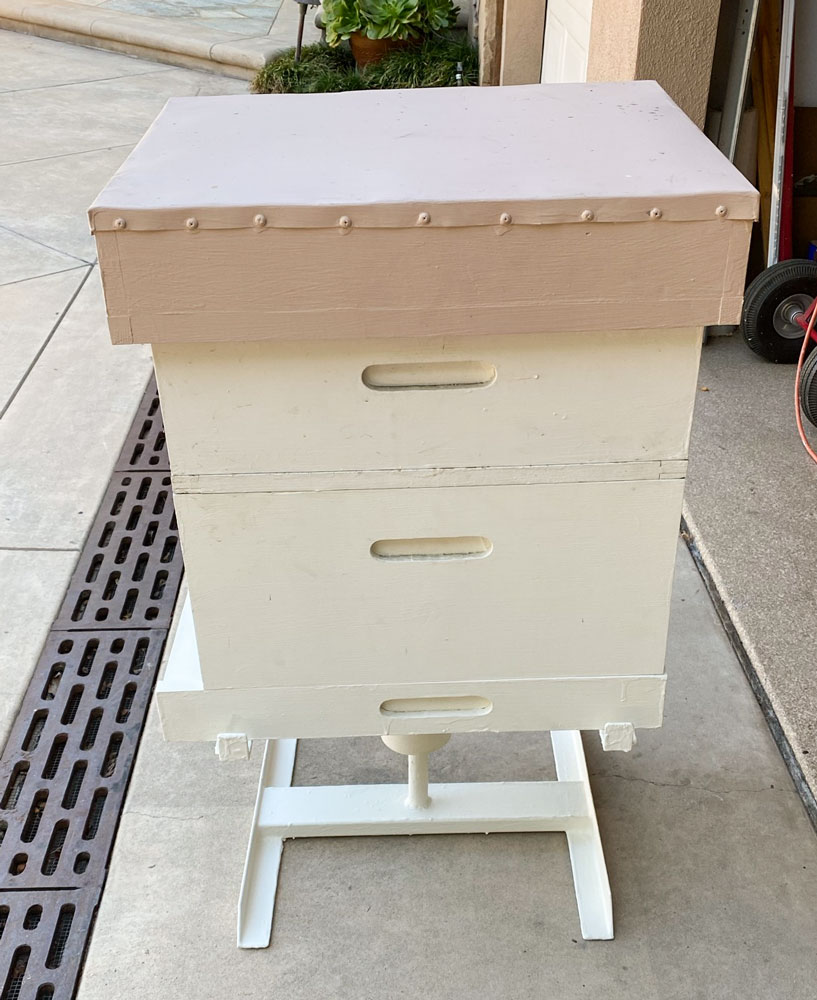
It looks pretty big but that's because I have insulation in the cover. Let me tell a story.
When I had the migratory covers on the hives, I'd occasionally go into a hive in the winter - at least I'd take the top off and look in. I noticed a lot of moisture on the inside of the cover, enough to wet the top of the frames under the cover.
I learned that the bees produced a lot of moisture, even in the winter. They can forage in the winter so some of the moisture comes from evaporating nectar. The other, perhaps larger, source was simply the metabolism of sugar in the honey. The metabolism of sugar gives off water vapor. The chemical formula is:
6O2 + C6H12O6 --> 6CO2 + 6H2O
[Let me add an aside here: Sucrose (table sugar) is C12H22O11, a disaccharide. The bees use an enzyme, invertase, to convert one molecule of sucrose to one molecule of glucose and one molecule of fructose, both monosaccharides, both of which have the chemical equation C6H12O6. Honey, therefore, is made up of glucose and fructose and when the bees use it as food, the equation given above pertains. Glucose crystalizes much easier than fructose so when honey crystalizes, the crystals are generally glucose.]
This moisture can cause problems for the bees if it falls on them in the winter - possibly killing them. Additionally, the water was soaking the frames causing degradation of the wood.
First I tried something called Bee Quilts. I won't go into detail on that but they didn't work very well. Then I got the idea of insulating the top so that moisture wouldn't condense on the inside of the top. It does condense on the sides, but the water just slides down the sides and doesn't cause problems.
I made the telescoping tops and put two 1 inch layers of insulating foam inside the telescoping top. The foam is R-5 per inch, and the wood of the telescoping and inner cover are each R-1, giving a total of R-12. That worked well in the winter.
I decided to leave those covers on in the summer and they seem to help keep the hive cool in the summer - by reducing the heat coming in from the top. Here's a picture of the inside of the telescoping cover, showing the foam.
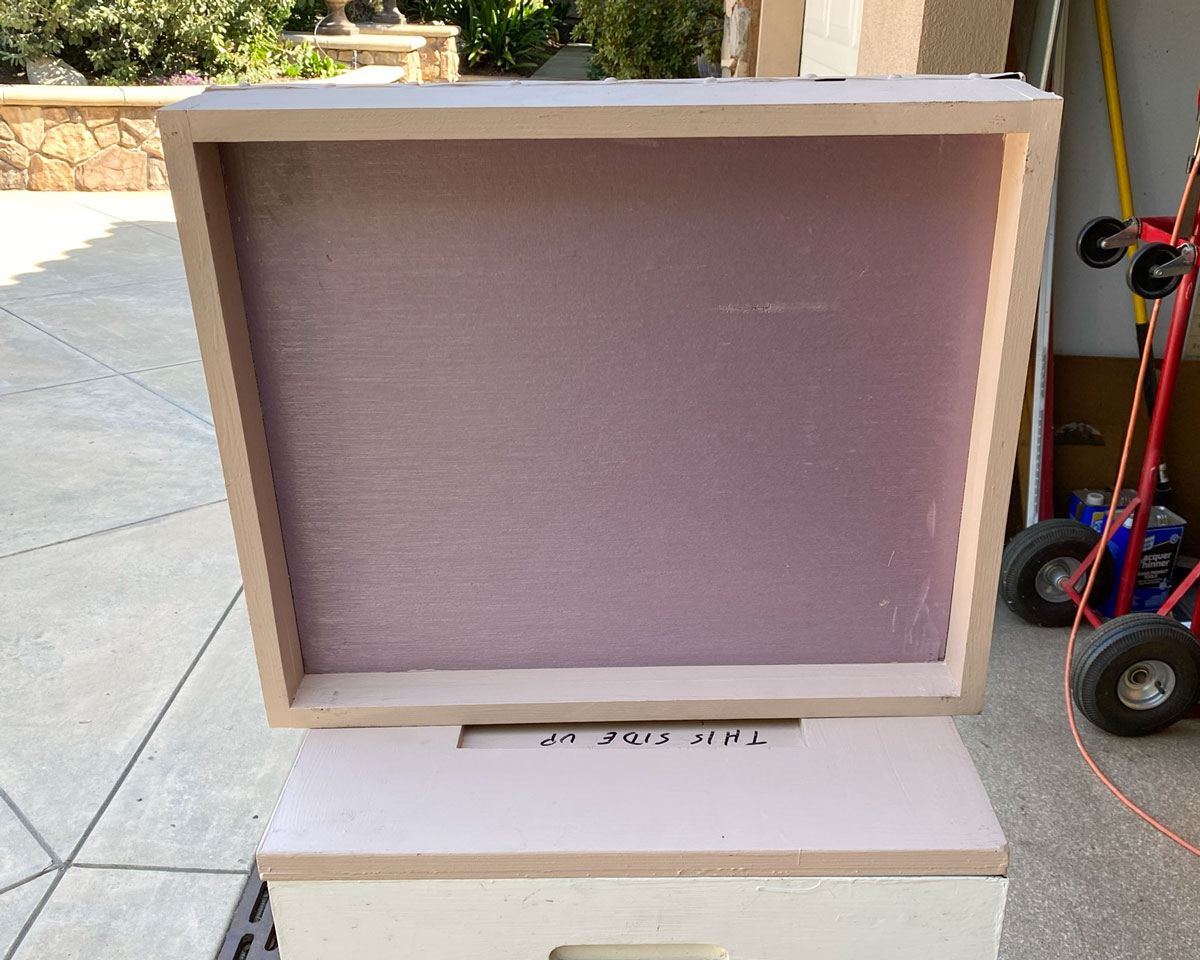
In actual use, the hive would likely consist of two brood boxes and more than one super. As you can see from the first picture, I have two brood boxes on that hive and three supers.
One additional important thing: When you set up your hive, you want the hive tilted slightly towards the front. You do this so that when it rains, water does not come into the hive and pool up at the back of the bottom board. Bees can drown in the pool and the water will eventually rot the bottom board. You don't have to tilt the hive a lot. Look at the first picture on this page and you'll notice the hive is tilted slightly forward.
That's the end of the discussion of the Langstroth hive. Next I'll talk about using a smoker, including what fuel to use, lighting the fuel and using the smoker at the hive.
You can go to the smoker discussion here